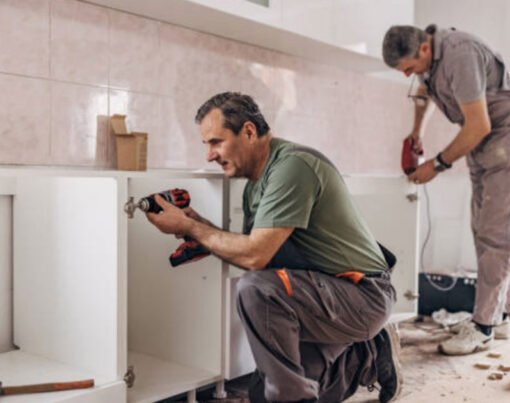
A recent survey shows that the 2020 trend toward home improvement projects is still going strong. Over 50% of homeowners plan to renovate their homes in 2023, but there’s something different happening this time.
Now, instead of renovating to sell their homes at a profit, homeowners are focusing on long-lasting interior improvements to increase their home’s comfort and appeal.
These projects include refurbishing their kitchens and bathrooms, improving energy efficiency, and making high-value improvements like installing new vinyl flooring.
If you’re one of these industrious homeowners, read this guide before you install vinyl plank flooring.
Table of Contents
What Is Vinyl Flooring?
Vinyl flooring is among the most popular floor coverings used in modern construction. Forecasters predict that North American homeowners will install 474.5 million square meters of vinyl flooring by 2026.
Vinyl plank flooring is a thicker, more stylish type of flooring when compared to traditional vinyl floors. LVP flooring comes in a range of styles, but designs that imitate hardwood flooring are by far the most popular.
It comprises planks suited for DIY installation using glue-down or simple click-lock installation. Other types of vinyl floors, like K-Trade and Karndean Looselay luxury vinyl plank systems, offer easy installation with no locking system.
Standard luxury vinyl planks are three to four inches wide, while wide plank luxury vinyl flooring has planks that are 5 to 9 inches wide.
You should always take the manufacturer’s recommendations into account when choosing and installing luxury vinyl plank flooring.
The Benefits of Choosing Luxury Vinyl Plank Flooring
LVP flooring offers numerous benefits for homeowners who install this type of flooring. These are the main ones:
Exceptional Durability
Luxury vinyl planks consist of multiple layers of strong materials topped by a scratch- and stain-resistant wear layer. Thanks to this, it can withstand heavy foot traffic in both residential and commercial settings.
Stylish Good Looks
LVP flooring adds sophistication to any room. You can choose from a wide range of textures, finishes, and colors to suit your interior decor, including hardwood and marble-look floors.
It’s soft and quiet underfoot and provides a degree of insulation thanks to its multiple layers.
Water Resistance
LVP offers superior water resistance when compared to most other flooring. This means you can install it in your kitchen or bathroom without fear of it warping.
Easy to Maintain
LVP flooring is one of the easiest types of floors to maintain. You can keep it in pristine condition with a simple sweeping and vacuuming routine. Plus, if you use specific wheels for hardwood floors, you won’t have to worry about furniture damaging it
How to Install Vinyl Plank Flooring Yourself
If you’re convinced that vinyl flooring is the right fit for your home, you can go ahead and get a professional installer to do the work for you, or you can save money by installing the flooring yourself.
It should take one or two days to install your vinyl plank flooring. You can install these floors regardless of the season or weather, but you should allow the planks time to acclimate before starting work.
Measure Your Floor Space
Measure the longest and widest parts of your room and round up to the next foot. For instance, if your floor measures 11.2 feet long, round that number up to 12 feet.
Then, divide the two numbers by each other to get your room’s square footage.
For oddly shaped rooms, divide the area up into blocks and measure each one. Then add these square footage figures together.
This way, you’ll end up with enough planks to make up for cutting, trimming, and centering the planks around your room.
Acclimate the Vinyl Floor Planks
It’s important to acclimate your luxury vinyl planks before you install your flooring. This will maximize their lifespan and performance and prevent warping, gapping, or buckling after installation.
This is a simple process that involves leaving the planks in your room for up to 48 hours before installation. You can skip this process with some high-end brands of LVP, but check with the manufacturer first.
Gather Your Tools and Materials
There’s nothing more frustrating than having to head out to the hardware store halfway through your installation because you don’t have something you need.
Make sure you have the following materials on hand before you start your floor installation:
- LVP flooring
- ¼-inch joint spacers
- Painter’s tape
- Underlayment
- Adhesive (if required)
- Pencil or chalk
- You’ll also need the following tools:
- Measuring tape
- Straight edge
- Utility knife
- Plank flooring cutter, jigsaw, or circular saw
- Pry bar
- Rubber mallet
- Tapping block
- Level
- Safety glasses and gloves
- Straight edge
- Multi-tool or jamb saw
Once you’ve assembled all these necessities in one place, you can get to work removing your old floor.
Remove the Existing Flooring
The type of flooring you have will determine how you go about this first step. If your old floor is glued down, you’ll need to cut it into strips and peel it off the floor.
This is an arduous, time-consuming task, and it’s often worth paying a professional to do it for you.
Once you’ve removed the old floor, you must clean the subfloor thoroughly to make sure it’s free of adhesive residue, nails, and debris.
Remember, some older floors or adhesives may contain asbestos. Cutting, chipping, or sanding these materials could release asbestos into the air.
If you suspect there’s asbestos in your old floor, it’s best to get a professional team to remove it.
Assess and Improve the Subfloor
It’s critical to install your vinyl planks on a structurally sound subfloor. It must be level to within a quarter inch or less rise per 10 feet.
The subfloor must have no bumps or dips. Vinyl plank flooring will telegraph and develop obvious high spots if the subfloor is uneven. A belt sander works well to smooth down any rough patches on the subfloor.
Make sure you patch any significant cracks and expansion joints in the subfloor and hammer down any visible nails. Use a putty knife to scrape away dried paint, mud, or drywall compound.
Finally, blot the surface dry and brush away any visible dirt and dust.
If you’ve recently installed a subfloor, you must wait at least six weeks before you install LVP flooring on it.
Prepare Your Walls
Remove all types of molding from the room’s perimeter using a pry bar.
Set aside the baseboards, trim, and shoe moldings. You can reuse them unless you want to upgrade your moldings.
If you are leaving your door casings in place, undercut the jambs so the vinyl flooring can slide underneath them. You do this accurately by laying a piece of vinyl floor plank against the door and marking the height with a pencil.
Cut the casing with a multi-tool, then remove the plank and complete the cut with a door jamb saw or multi-tool.
Create an expansion gap for your floor by setting joint spacers around the perimeter of the room against the wall. You should place the spacers about 24 inches apart.
Alternatively, you can lay scrap ¼-inch boards against the wall and secure them with painter’s tape. If you’re using manufactured plastic spacers, you should place them on top of the planks instead of against the wall.
Plan the Floor Layout
It’s important to consider the direction in which you will install the planks before you get started. In most cases, it’s best to lay the planks in the direction of the room’s longest side or your house’s longest side.
You may need to consider the direction of similar flooring installed in adjacent rooms, too.
You can’t change the direction of your floor planks once you’ve started cutting them, so take your time figuring out the most workable solution for your room.
Place the Underlayment
Choosing the right underlayment will protect your vinyl planks from moisture and provide a layer of cushioning. This prevents dampness and mold growth and will improve your new floor’s longevity and performance.
Start in a corner when installing your underlayment and lay it out in the same direction you will install your flooring. Leave a 1/8-inch gap between the underlayment and the wall.
If your underlayment has a water barrier, make sure you install it with the barrier facing downward, directly onto the subfloor. If it has no attached waterproof barrier, apply a barrier made from plastic sheeting over the underlayment, overlapping the seams by 8 inches and sealing them with tape.
Trim the underlayment as you go along using a utility knife, ensuring a snug fit along doorways, corners, and edges. Make sure each piece of underlayment fits snugly against the next one without gaps or overlaps.
For extra stability, secure the underlayment with duct tape. This will ensure it stays in place and lays flat while you install your floor.
Once you’ve completed these preliminary steps, you’ll have a well-prepared surface that’s ready for your new flooring.
Tips for Measuring and Cutting Planks
You’ll need to cut several of your vinyl planks as you go about the installation process. It’s imperative that you carry out this part of the job with extreme precision.
Always mark a cutting line on your plank before you reach for your cutting tools. Use a straight edge and a pencil to draw a cutting line on the plank, taking the expansion gaps into account.
You should place the plank on a stable surface and secure it with clamps while you cut it, following your guideline to ensure a neat, precise edge.
Make sure you have a sharp blade in your cutting tool before you start, and try a few practice runs on scrap pieces first.
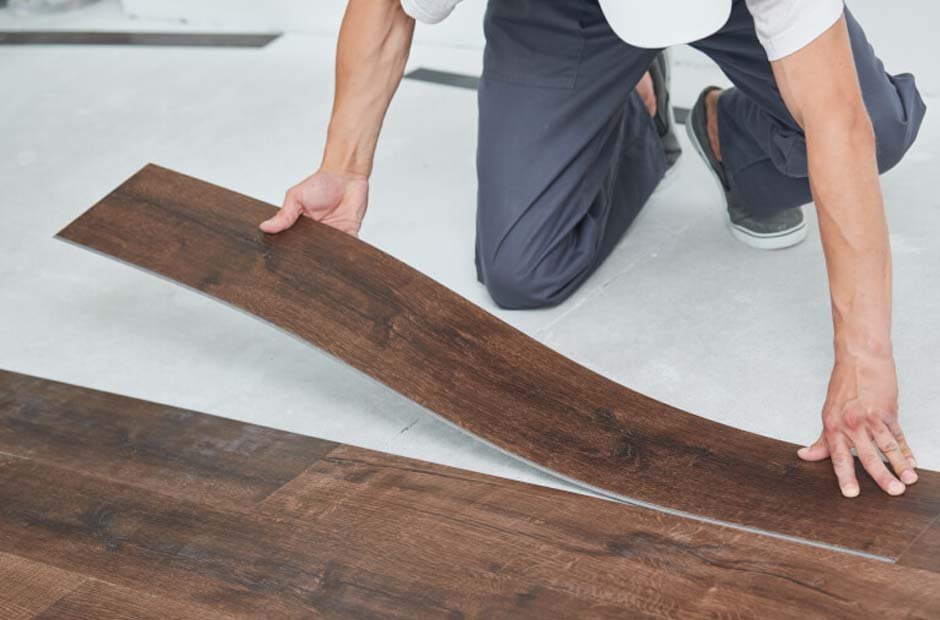
Install the First and Second Rows
The first and second rows will set the tone for the rest of your installation, so you must exercise extreme care when placing these planks.
You should aim for all your planks to be no shorter than 8 inches long, and this determines how you’ll commence with your first row.
Measure your floor’s length and divide that measurement by the length of each plank. If the answer is greater than 8 inches, you should use a full-size plank to start your installation.
If it’s less than 8 inches, you should cut your first plank so that the final board will end up more than 8 inches long.
Always start the first row against a wall with the planks’ grooves facing toward the room and the tongues against the wall. Dry-fit the planks about 12 inches away from the wall using the entire first row of planks and joining them together on their short sides.
If the boards don’t snap into place easily, tap them with a rubber mallet.
As you go along, cut the tongues off the planks using a utility knife. This ensures the planks fit neatly and tightly against the wall.
When you get to the end of your first row, cut the last board to the correct size and slide the row of planks into place against the wall.
When you start your second row, be sure to stagger the short joints of the planks. This creates a better visual effect and adds stability to the floor.
You should aim to place the joints of your new row between one or two-thirds of the way between the joints of the adjacent row.
Work along the second row of flooring by locking the planks into place from the side. It’s best to do this by holding the new plank at a 15-degree angle to the installed plank, so the tongue and groove match up.
When you fold the new plank down flat, it should slot into the groove of its neighbor. You might need to tap the board on the edge to ensure a snug fit.
You’ll work along your floor, row by row, in much the same fashion until you reach the last row. In most cases, you’ll need to cut the final row of vinyl floor planks lengthwise to fit them into the remaining gap.
Measure the planks carefully, remembering to include space for expansion, mark the cut lines, and use a circular saw, handsaw, or jigsaw to perform an accurate, neat cut.
Insert the tongues of the last row into the grooves of the already installed rows and lay them flat.
Add the Finishing Touches
With your luxury vinyl floor in place, you can remove the spacers and transition pieces. Finally, put the moldings back in place to cover the expansion gaps between rooms and in doorways.
Live it Up in 2023
When you install vinyl plank flooring, you’re making a lasting investment in your home. You’ll improve its value and appeal, as well as create a more luxurious and comfortable space for your family.
Are you eager to discover more home improvement ideas? Browse our blog for information on the world’s most interesting topics.