Our lives are gradually embracing winter as the temperature drops. The advent of winter brings heavy snowfall. When spring arrives after a long winter of transition, you must clean your home, including your outdoor decking. Spring cleaning makes everything appear better.
Spring is not only a great time for homeowners to spruce up their landscaping, but it’s also a great time to inspect and fix any damage to your outdoor decking.
Table of Contents
Here are a few ideas for spring deck upkeep.
Look for platforms that have been damaged.
You may not have observed some apparent damage during the long winter months when snow piled up on your deck boards. Take some time now, in the warm spring sunshine, to fully examine your outdoor wood decking. Check the deck area for any of the issues listed below.
rotted timber
Check for softened, splintered, or loose planks. Check the sill plate, which is the area where the outdoor deck is connected to the house, in particular. This is due to the fact that rotting boards in this area can be hazardous to the complete deck structure.
Mold
Although mold is not as dangerous as rot in wood decks, it must be removed before further damage happens. When removing wood deck mold, avoid using bleach because it can harm your siding, sidewalks, and landscaping. To remove the mold, apply the decking board stain or the manufacturer’s suggested wooden deck cleaner.
Hardware that is loose
If there are any sections of the wood deck where fasteners or screws are missing or loose, the missing fasteners or screws must be replaced right away. If you notice any nails that are out of position, simply knock them back into place.
Infestation of pests
If you notice signs of erosion on your wood deck, you should contact pest management.
Call a professional if you’re unsure what to look for or if you discover damage but aren’t sure what to do next.
Before staining, was the timber deck pressure washed?
If you have a new timber deck, wait several weeks before staining or sealing it. Allowing a few weeks allows the pressure-treated timber to dry. The “sprinkle test” can be used if you are unsure of the right time. A few droplets of water should be placed on the wood. If the wood takes the water within 10 minutes, strain it immediately. Allow more time for the water to create beads on the surface of the wood.
Washing your deck before staining it is a good option. Because it’s new, you won’t need to do a thorough clean like you would for a deck that has been covered in dirt for months. Of course, use caution when pressure washing, as excessive pressure can cause the timber to splinter. A basic sweep and wash with soapy water is far superior.
Is it necessary to sand my timber deck before staining it?
Washing your deck before sanding is a good suggestion whether it is old or new. Otherwise, you risk sanding dirt into the fibers of the flooring.
It’s time to sand the veranda once it’s dry. When sanding pressure-treated wood, always wear goggles and gloves and take extra measures. Sanding too fine will prevent the stain from really sinking in, and sanding too rough will cause the new stain to settle in too deeply and become too dark.
What is the easiest way to clean the deck?
Bleach and chemicals should be avoided. Instead, use an oxygenated bleach cleanser to scrub. Before using the cleaner on the complete deck, test it on a small area first.
Again, unless you use a low-pressure option and keep the nozzle at least 6 inches from the surface, avoid power washing. For any stained regions, use a hand brush. When done, thoroughly rinse the cleaner with a garden hose.
Is it necessary to clean your deck planks after sanding?
This is a difficult issue. In general, the response is dependent on the surface of your deck. If your surface is rough and has splits and gaps, you should sand it first. However, if your boards have any grime or debris on them, you should avoid sanding.
You’ll need to clear the board after sanding, but since you should have cleaned it before sanding, it’s best not to clean it again. To clear the dust, use a shop vacuum or leaf fan.
What is the finest method for staining a deck?
After you’ve cleaned and sanded your deck, it’s time to stain it. Begin with the railings on the deck and make your way down. To safeguard your wood, use a stain with a built-in sealer and UV protection. If your wood is inherently beautiful, consider using a clear sealer or a light-colored stain. If the deck has more wear and tear, a deeper stain may be preferable.
Upgrade your backyard decking
While outdoor decks provide more pleasure, they also require more work. However, frequent maintenance visits are necessary to keep your deck looking great and increase its longevity.
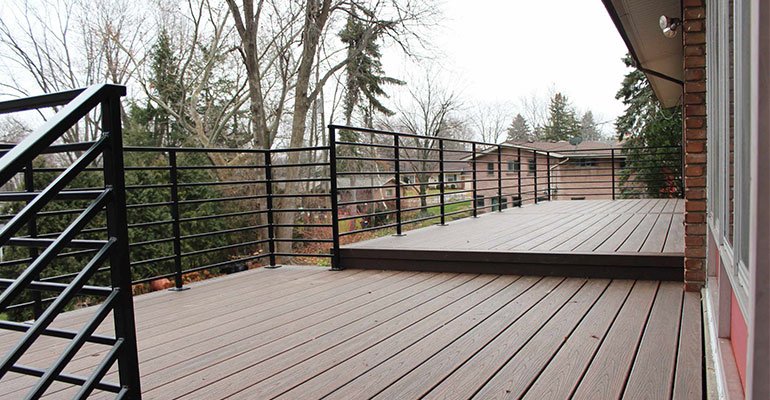
If you’re weary of staining your outdoor deck every one to three years, consider upgrading to a composite deck. With composite decking, all you have to do is maintain the boards clean; no staining or sealing is required. You’ll be able to enjoy the outdoors for a long period without incurring additional maintenance costs.
Composite decking is eco-friendly and comes in a variety of hues and wood grains. It is also extremely resistant to rot, mold, and warping, making it an excellent choice for outdoor decks.
Add outdoor furniture to your balcony
When your outdoor deck is finished, it’s time to update your furnishings. The correct furniture can make your outdoor enjoyment more comfortable. Outdoor rugs and side tables that match help to complete your outdoor living area.
Consider adding accessories to your outdoor living area in addition to deck furniture. From lighting to structures like pergolas or deck roofs, you can build a deck that provides shade and beauty all year.